My Ergodox Build Log
How I built my own Ergodox keyboard.
.jpg)
Background
The Ergodox is an open source mechanical keyboard with a split design. There are often kits for it on Massdrop, but they don’t run all the time and can get pricey (~$300!). I wanted to build one of these keyboards myself to save money over the kit, but that goal had limited success. This project took several months, and I’m still working on adapting to this custom layout.
Sourcing Parts
It seems that the official ergodox.org website is no longer registered to the rightful owners, or at least it’s no longer showing anything. This makes things difficult for getting a comprehensive and official guide for building one of these.
On Board Parts
I found that this link was really helpful as a general purpose guide for building the keyboard. In addition, I could also refer to the kit’s instructions (from Massdrop) as reference.
This comment on Reddit outlines a complete parts list for the on-board components.
All of these components can be purchased from DigiKey:
 In my build, I swapped the red leds with green ones. As long as they are the same size
it should work.
Acrylic Case
The acrylic case that I manufactured was from this GitHub repo. The dimensions given were in metric units, however the local place that I found to buy acrylic only gave thickness in fractions of an inch. For the top and bottom layers, I used 1/8”. The middle layers were both 3/16”, just slightly thicker.
1/8" - White - Top plate
3/16" - Black - Spacer plate
3/16" - Black - Key plate
3/16" - Black - Spacer plate
3/16" - White - Bottom plate
I went through a number of sheets of acrylic before I got a good cut. There was an issue with the lens of the laser cutter that I used that would result in burning and warp the surface of the acrylic. Ordering extra sheets is always a good idea.
I found that black glossy acrylic would scratch easily and show fingerprints. While this was fine for the rest of the keyboard, I chose to get the top layer in white acrylic to prevent this issue. It also stood out from the black keycaps.
Etc. Parts
I was able to order a complete set of keycaps from pimpmykeyboard.com. I ordered plain black keys with no lettering, because I want to be able to reorder the keys later on. My one complaint is that the home row keys F and J were a matte finished compared to the rest, which I couldn’t tell from the images on the website. They did throw in a nifty seahawks themed keycap though.
The Teensy 2.0 and Ergodox PCB were ordered from mechanicalkeyboards.com. I think I also ordered the MX Clear switches from there as well, however those can be found in a lot of places. Bulk pricing meant that I could get an extra 20 keys for almost no additional price, so I did. I’ll find a use for those eventually.
Assembly
Assembly was easy, however it did take some time. I was able to follow the steps of the Massdrop guide, which was easy. Once I got started with the soldering of all the diodes and switches, it was easy to get into a rhythm.
.jpg)
.jpg)
.jpg)
I made sure to get the key plate done first before the other layers, so that I could get started on the assembly process. Afterwards I found some screws that fit and put the whole thing together. I’m still planning on getting some rubber feet so that it doesn’t move as much.
Other Stuff
One thing I learned the hard way was that the connector joining both sides of the keyboard is a TRRS connector. This means it has 4 connectors, not like a traditional AUX cable. I was able to overnight the correct cable the next day.
The keyboards scratch easily if they aren’t protected. I found some cheap ‘craft’ bags on Amazon that I now put them in. I need to get some nicer ones, or consider ordering some other ones.
Grifiti make some great wrist pads that make typing on this keyboard much easier. They conform right to the profile of the keyboard, and they are about the same height as the whole thing.
Firmware
Choosing firmware took a bit of research. The preset Massdrop firmware works but it’s not very customizable. I’m using a modified QMK Firmware. I might post my layout sometime. I added functions of mouse cursor support and multimedia keys. Plan is to eventually get emoji working.
Uploading isn’t very difficult, it’s just very weird saying that you have to compile and upload firmware for a keyboard.
Etc.
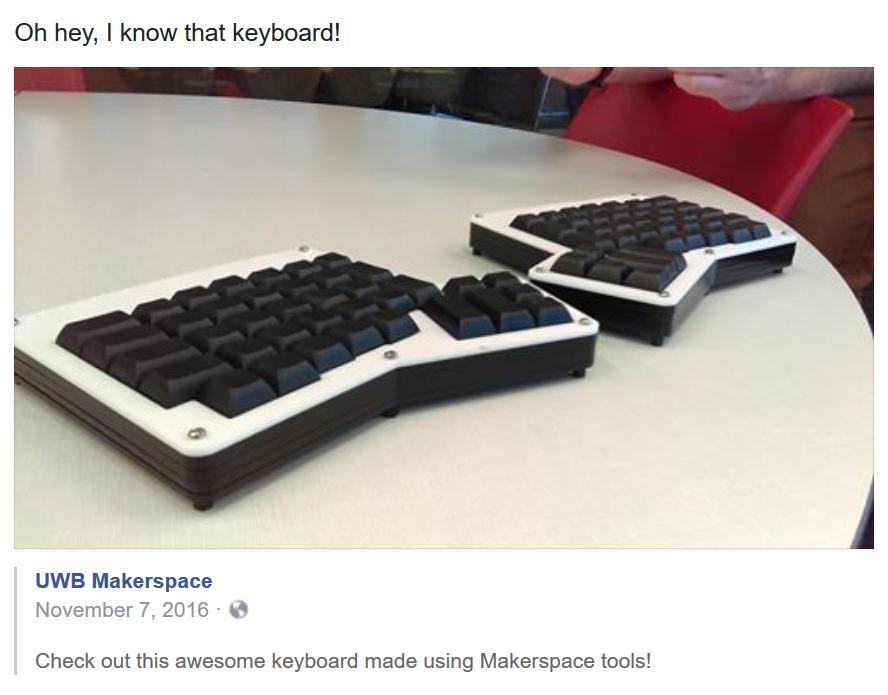
My School’s makerspace posted about my keyboard after building it. Neato.
